Once Lead Notifications have been created in Dealer Studio, you may need to update them—such as adding more users, adjusting lead categories, changing locations/websites, or temporarily disabling a notification.
This guide will walk you through how to manage existing Lead Notifications.
Before You Begin
The CMS/Dashboard has two levels:
-
Dealer Level – where Lead Notifications are created and managed
-
Website Level – for managing website content only
IMPORTANT: All notification setup and management must be done at the Dealer Level.
Step 1: Navigate to Existing Notifications
-
Ensure you are on the Dealer Level.
-
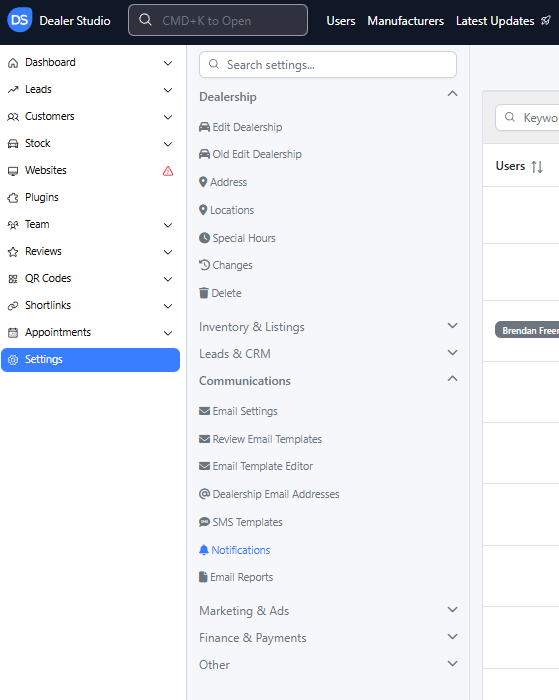
On the left-hand sidebar, go to Settings.
-
Under Communications, click Notifications.
You will now see a list/table of all existing lead notifications.
Step 2: Locate the Notification You Want to Manage
You can use:
-
Keyword search (by name, category, etc.)
-
Lead Category filter
-
Additional filters such as Location or Website
Once you find the correct notification, click Edit.

Step 3: Update Notification Details
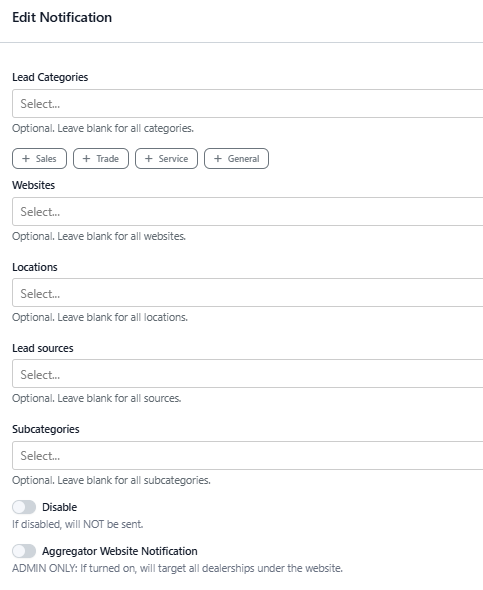
When editing a notification, the following fields can be updated:
1. Users
Choose who should receive the notification.
-
Search by name or email.
-
If a user is missing, ensure they have been added to the CMS (see Team Dashboard: A Quick Guide).
-
Avoid using the Emails field unless necessary. You may enter an email manually using the Emails field, though this method is not recommended, as it bypasses user management.
2. Lead Categories
Update which types of enquiries or bookings should trigger the notification.
Example:
If you want to include Sales team members, you may add categories such as:
-
New Vehicle Enquiry
-
Used Vehicle Enquiry
-
Test Drive Booking
Select or deselect categories as needed.
3. Website
Select the dealership website this notification applies to.
Useful when managing multi-site automotive groups.
4. Location
Choose which dealership location(s) the notification should monitor.
This ensures the right teams receive the correct leads.
5. Lead Sources
Filter notifications based on the origin of the lead:
-
Website
-
Facebook
-
Phone Call
-
Third-party integrations
Add or remove sources depending on your requirements.
6. Subcategories (Optional / Advanced)
Only use this if you require highly specific filtering.
Example:
Team Member Enquiry → Career Enquiry
Most dealers can leave this field blank.
Step 4: Save Your Changes
Once you update any fields, click Update Notification to save your changes.
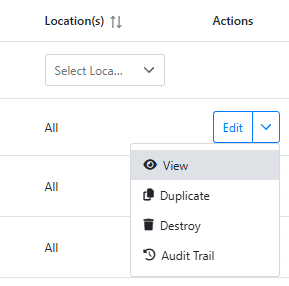
Step 5: Additional Management Tools
Each notification entry includes a set of useful actions:
-
Disable – temporarily turn the notification off
-
Duplicate – copy the notification and adjust for another user or department
-
Destroy – permanently delete the notification
These tools help you efficiently manage complex notification setups across multiple teams and locations.
You’re All Set!
Your updated notification settings will apply immediately.
Managing notifications regularly helps ensure:
-
The right people receive the right leads
-
No team member misses an important enquiry
-
Your dealership stays responsive across all departments
If you need guidance on creating a brand new notification, refer to:
How to Set Up Lead Notification