This guide will walk you through how to add columns or alternating column layouts to your website pages using the Page Editor. Columns are a powerful way to organise content, making pages more visually appealing and easier for visitors to read. Alternating columns can be used to create dynamic layouts, highlight key sections, and balance text with images for a more engaging experience.
Using the Page Editor, you can quickly create single, multiple, or alternating columns, add text, images, and buttons within each column, and adjust alignment and spacing.
Follow the steps below to learn how to add and customise columns effectively on your pages.
Finding the Page Editor
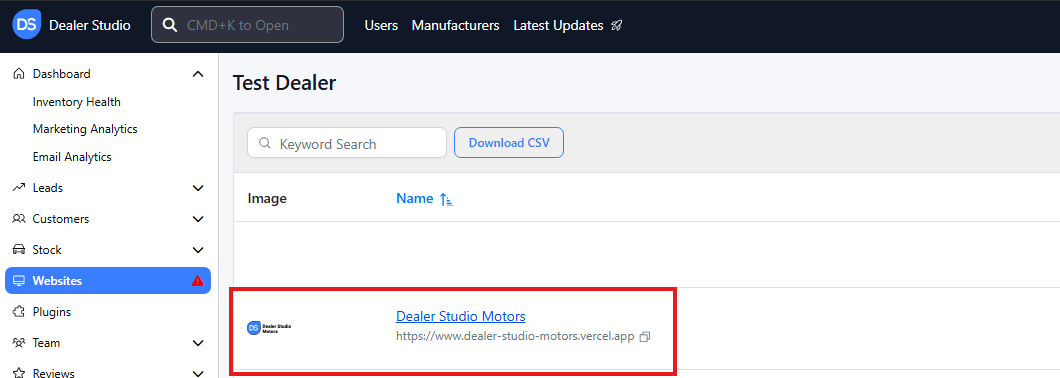
Step 1: On the Dealership Dashboard, select Websites
Step 2: Select the desired website to edit
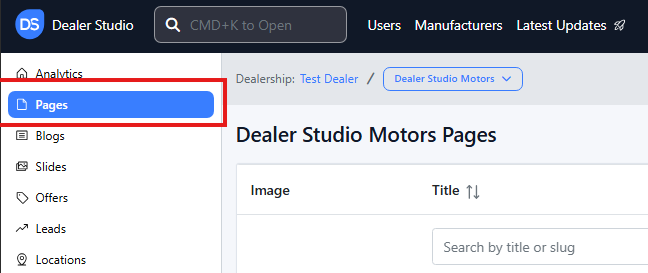
Step 3: Once on the Website Dashboard, select Pages
Step 4: Select the page you want to edit

Adding and Editing Existing Columns on Your Pages
-
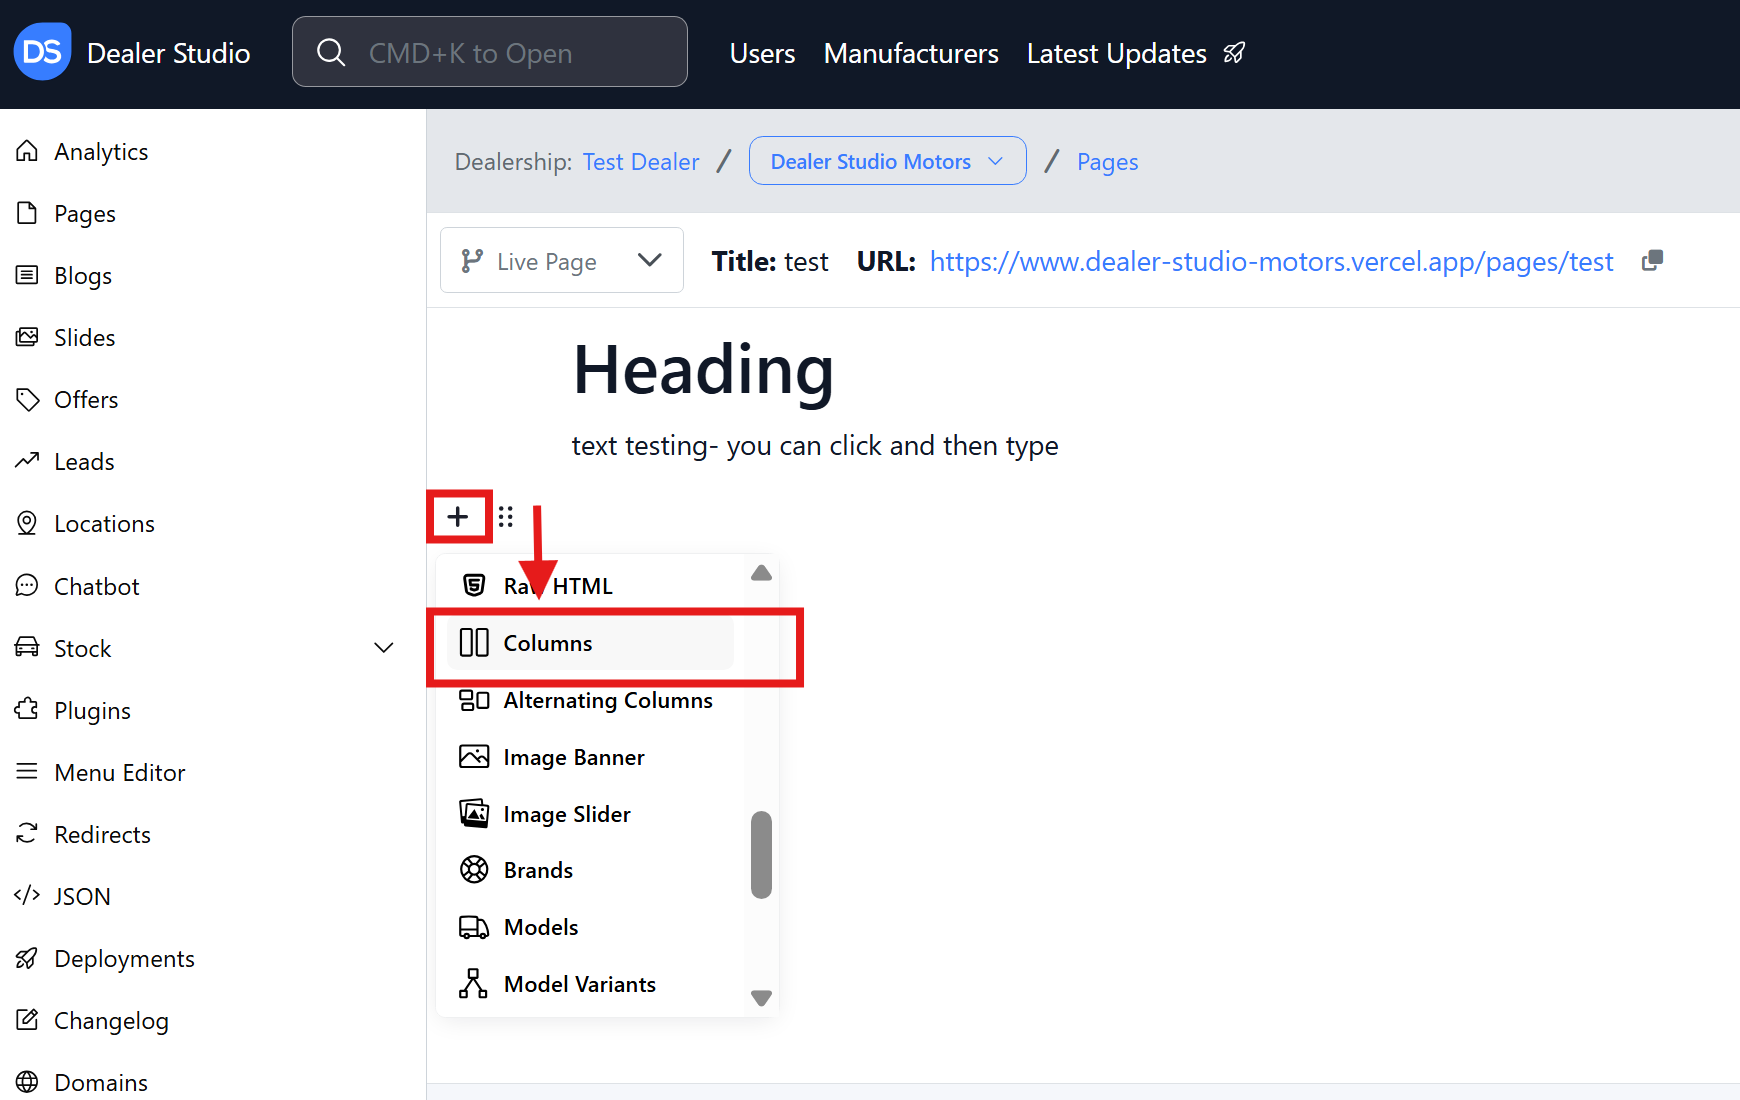
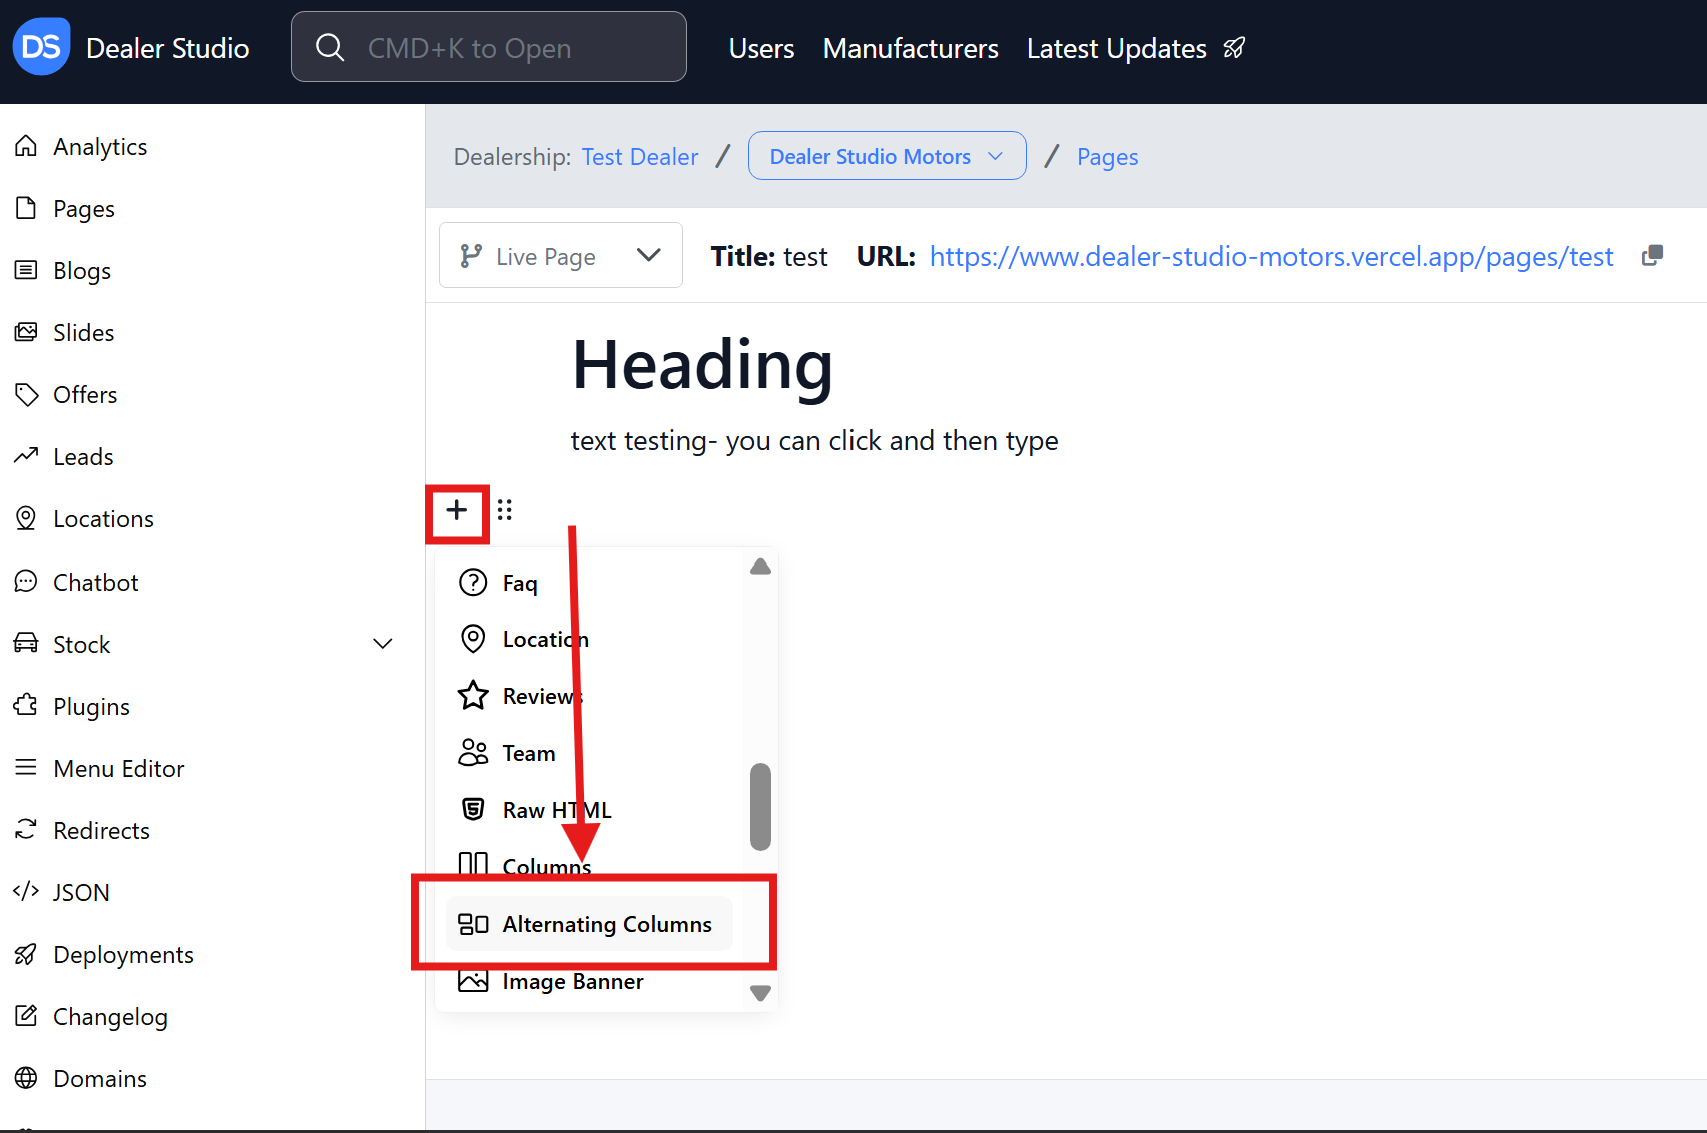
Navigate to the desired area of the page. Hover your mouse over the left-hand side until the + icon appears. Click on the icon, then scroll down and select the Columns button.
-
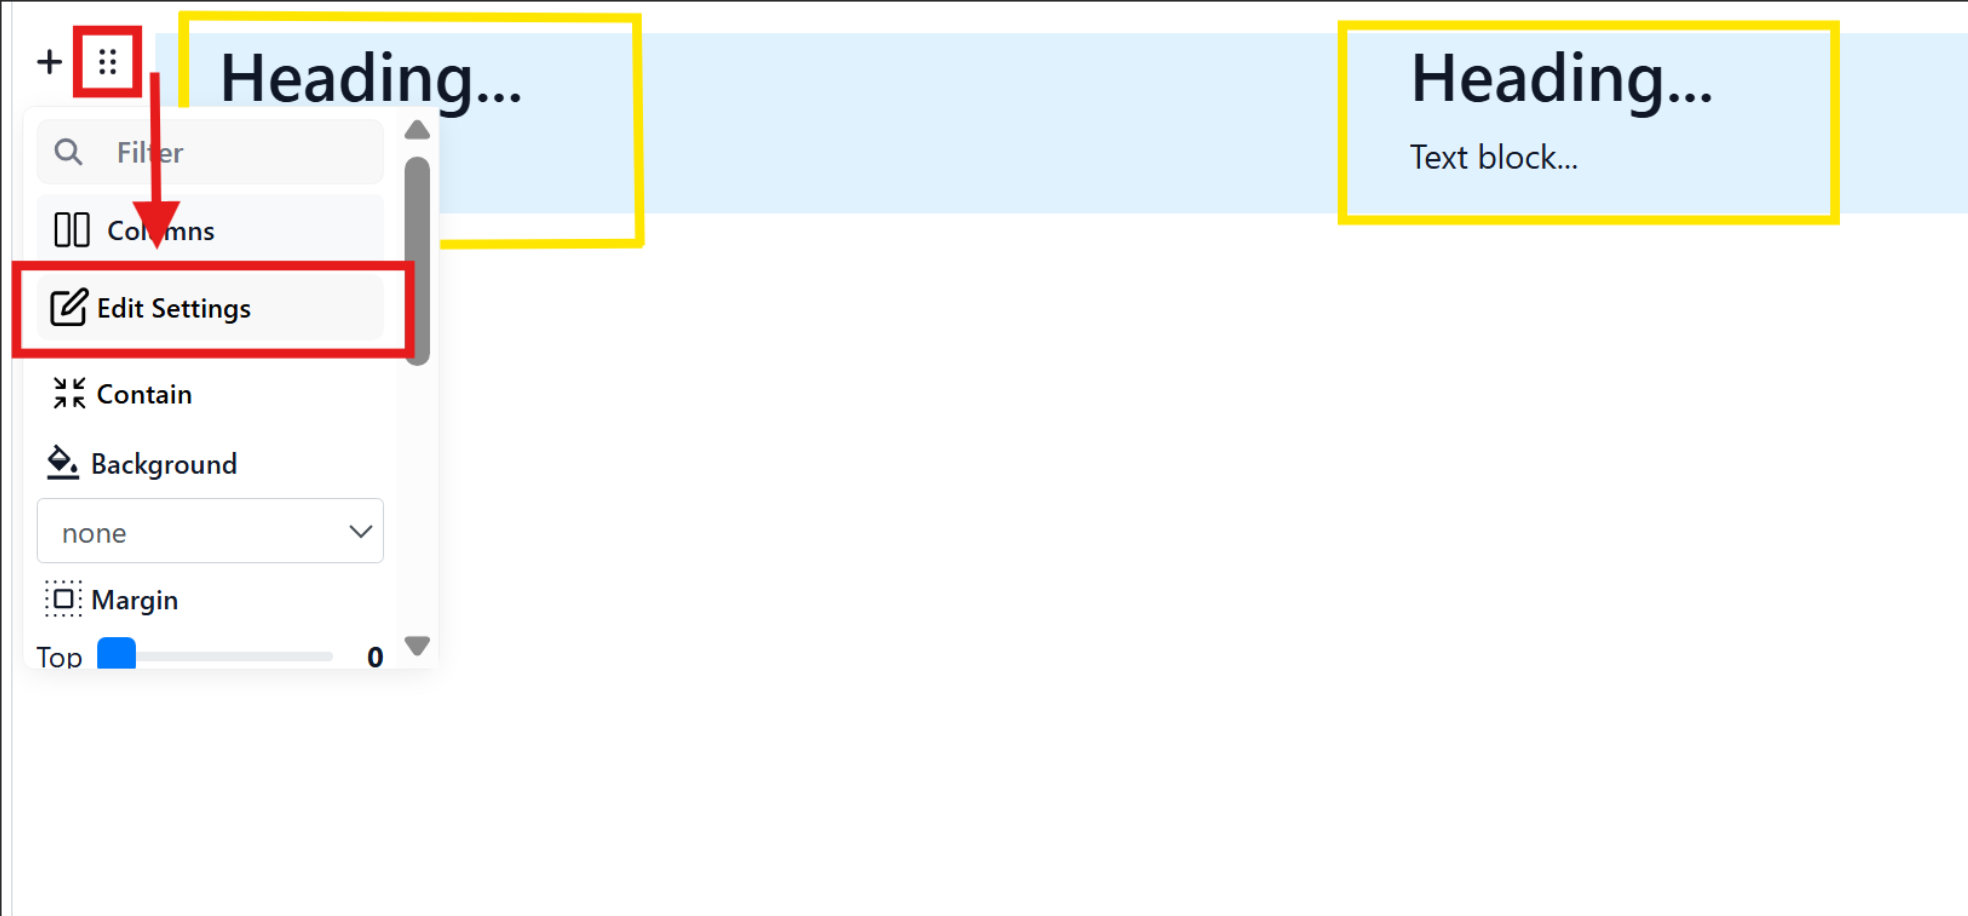
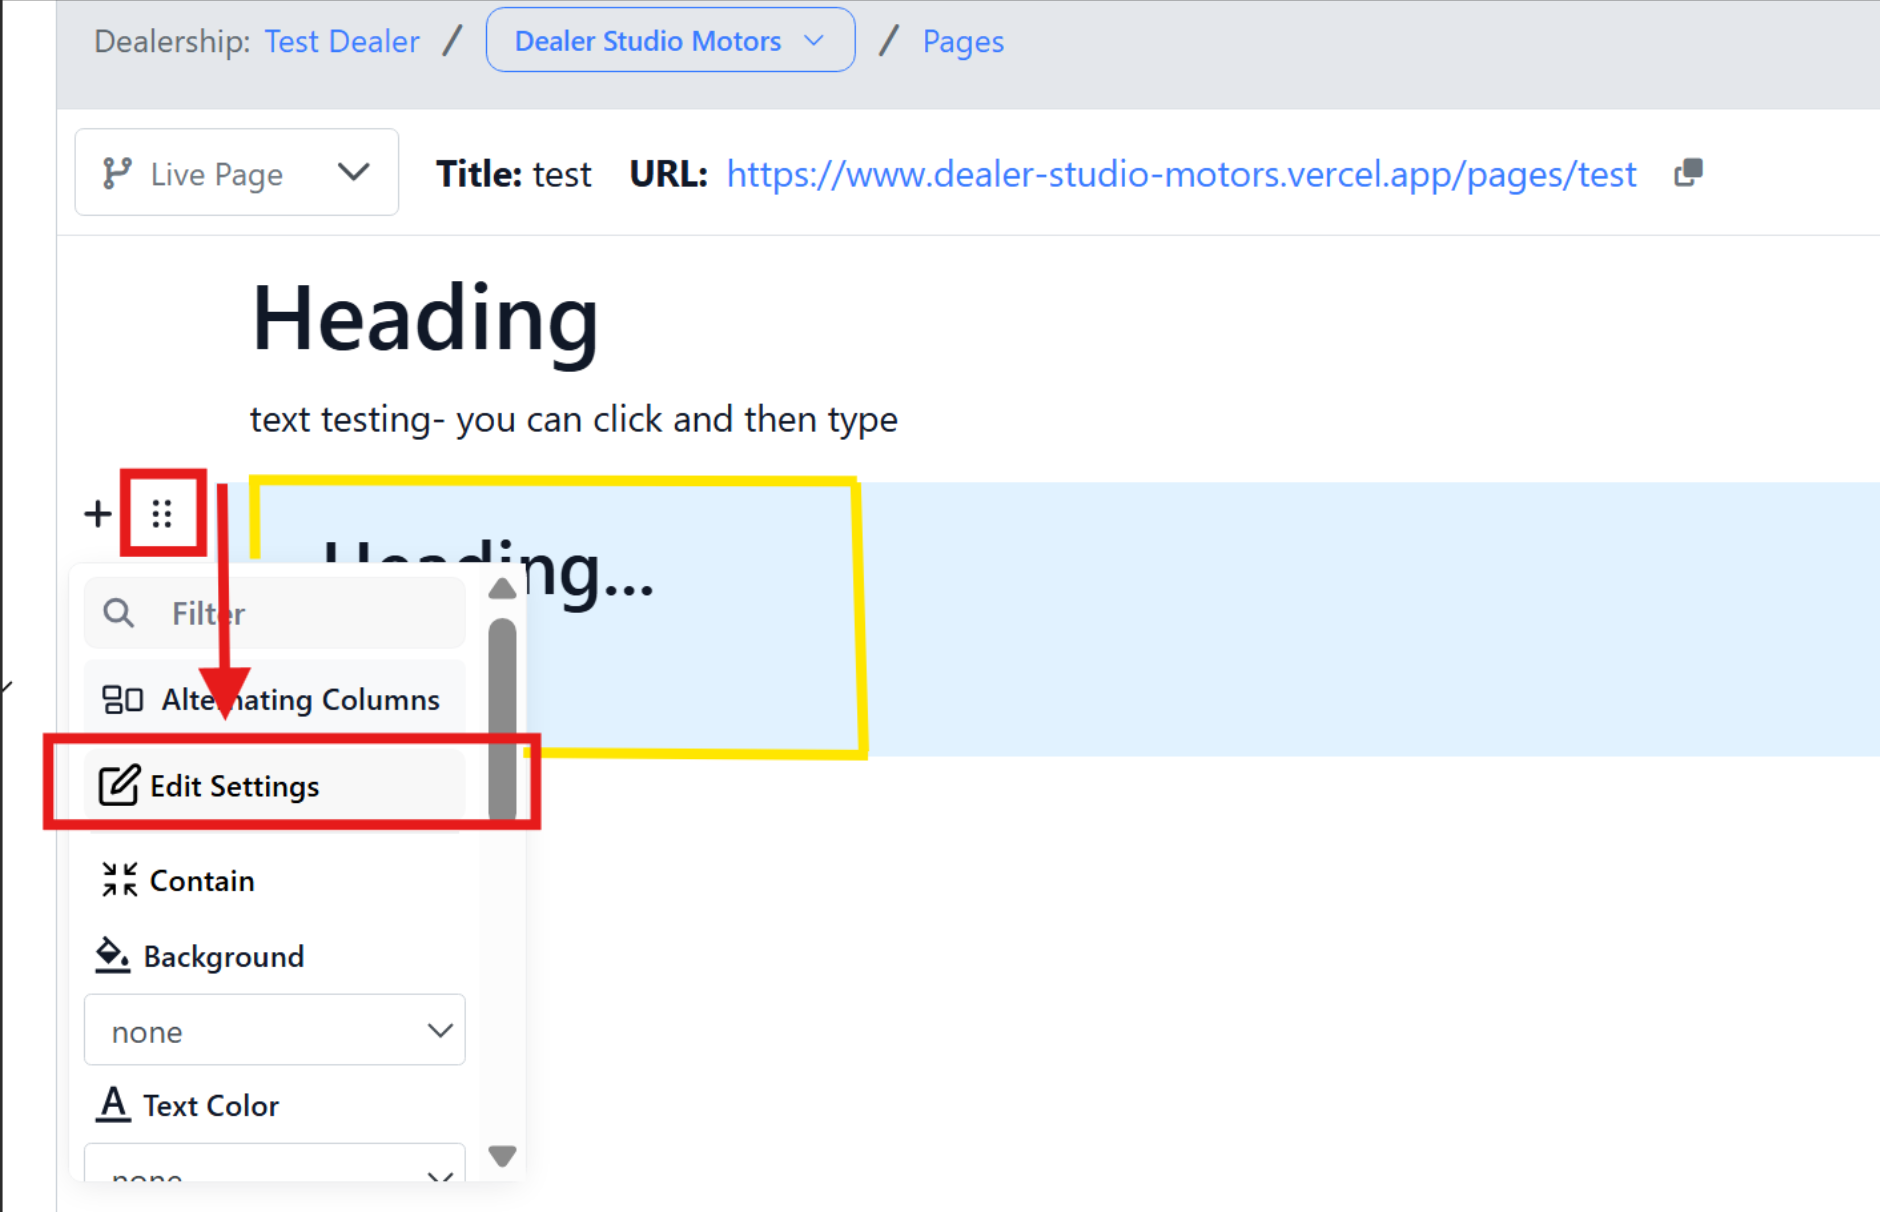
Two lots of text with Heading... and Text block... will appear. Hover your mouse over the left-hand side of the page where this text is until the 6 dots icon appears. Click on the icon, then select the Edit Settings button.
-
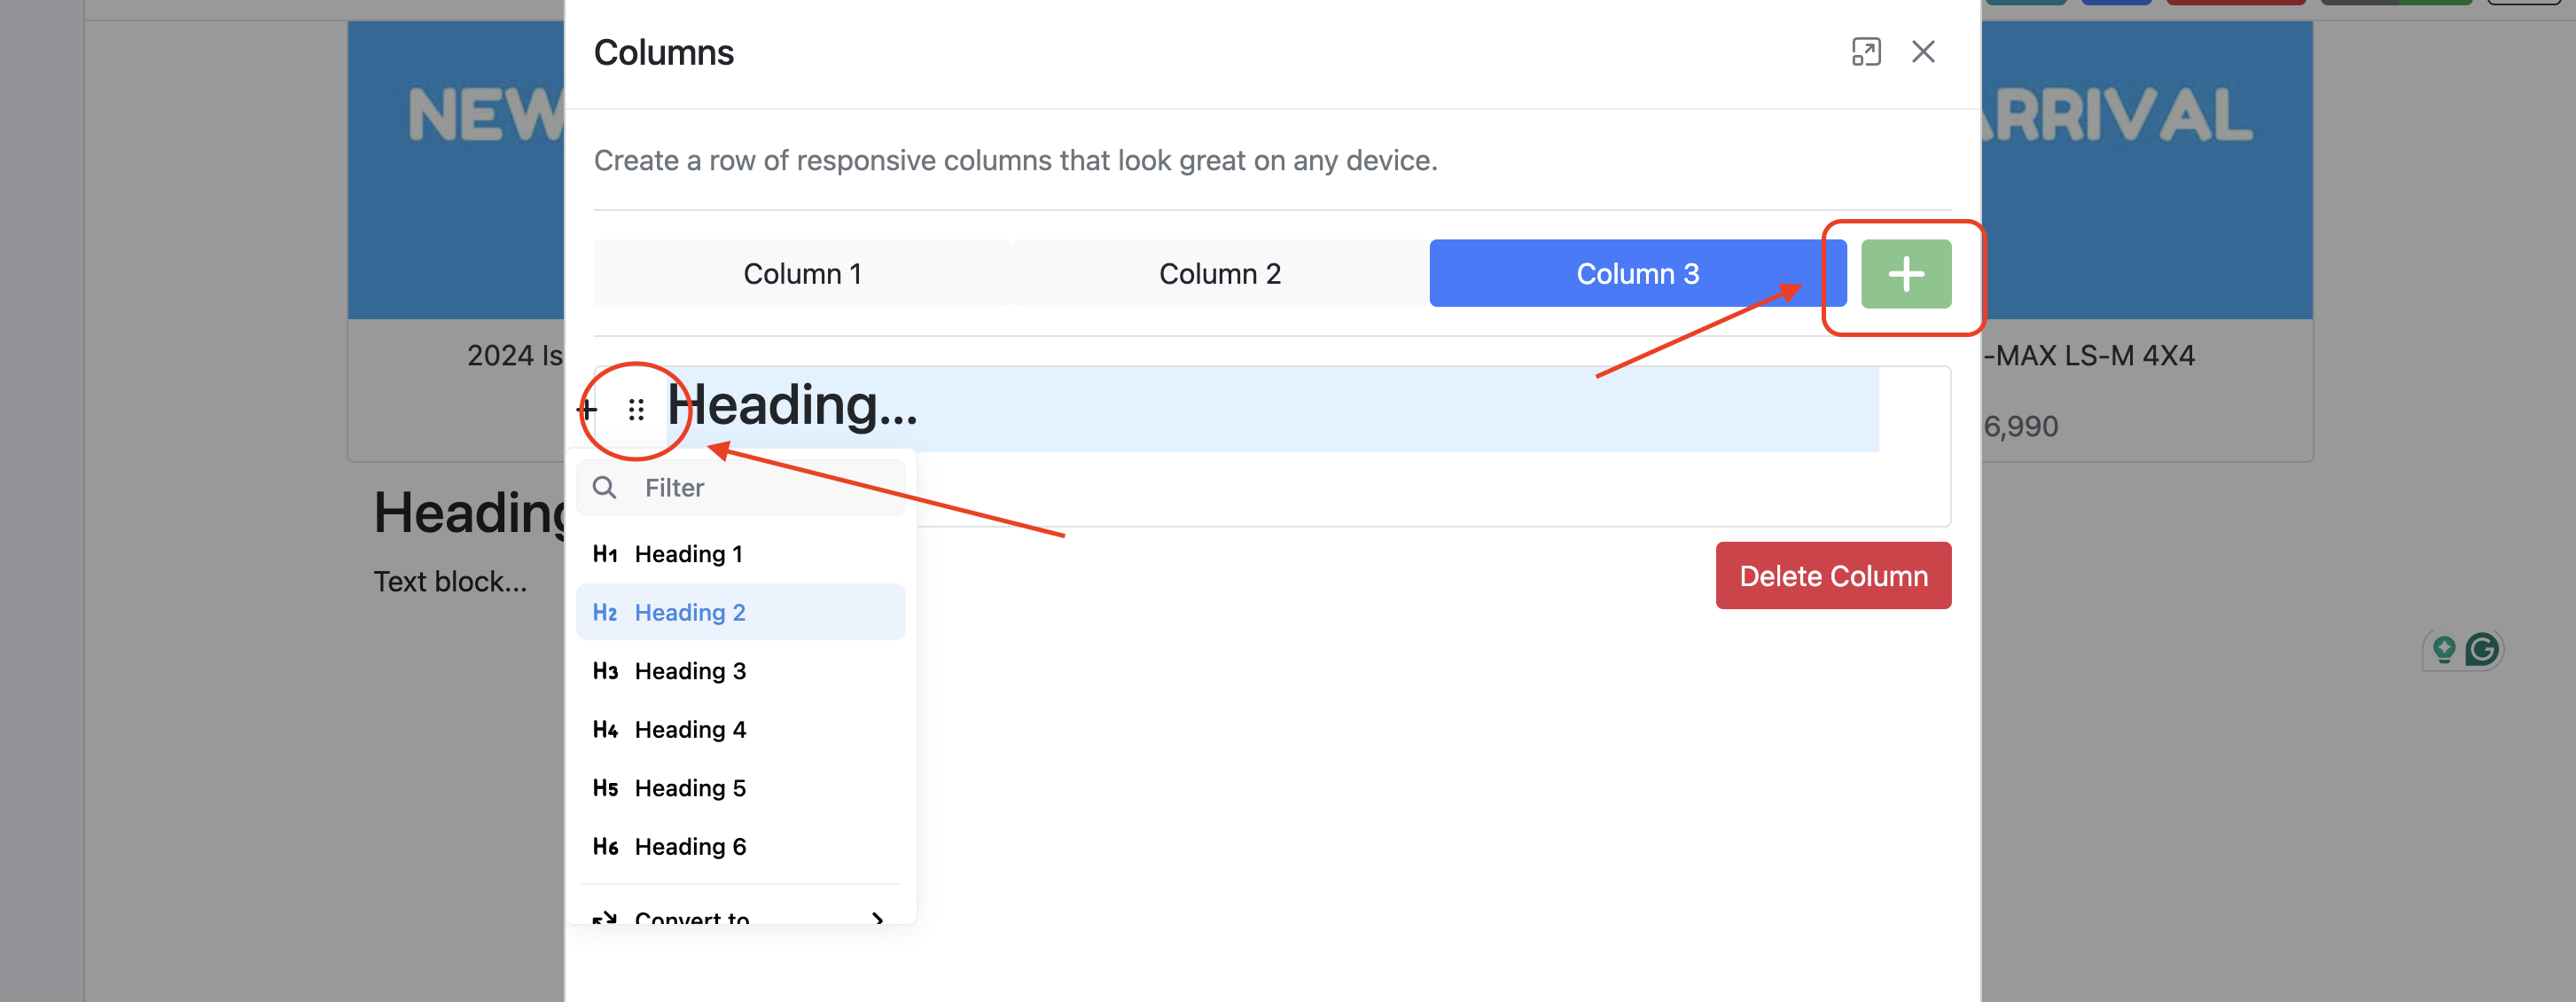
A box will open to customise your columns. To add text, simply highlight the Heading or Text block... and begin typing.
To add features such as images, lists, buttons, tables or FAQs, select the plus icon next to the text block.
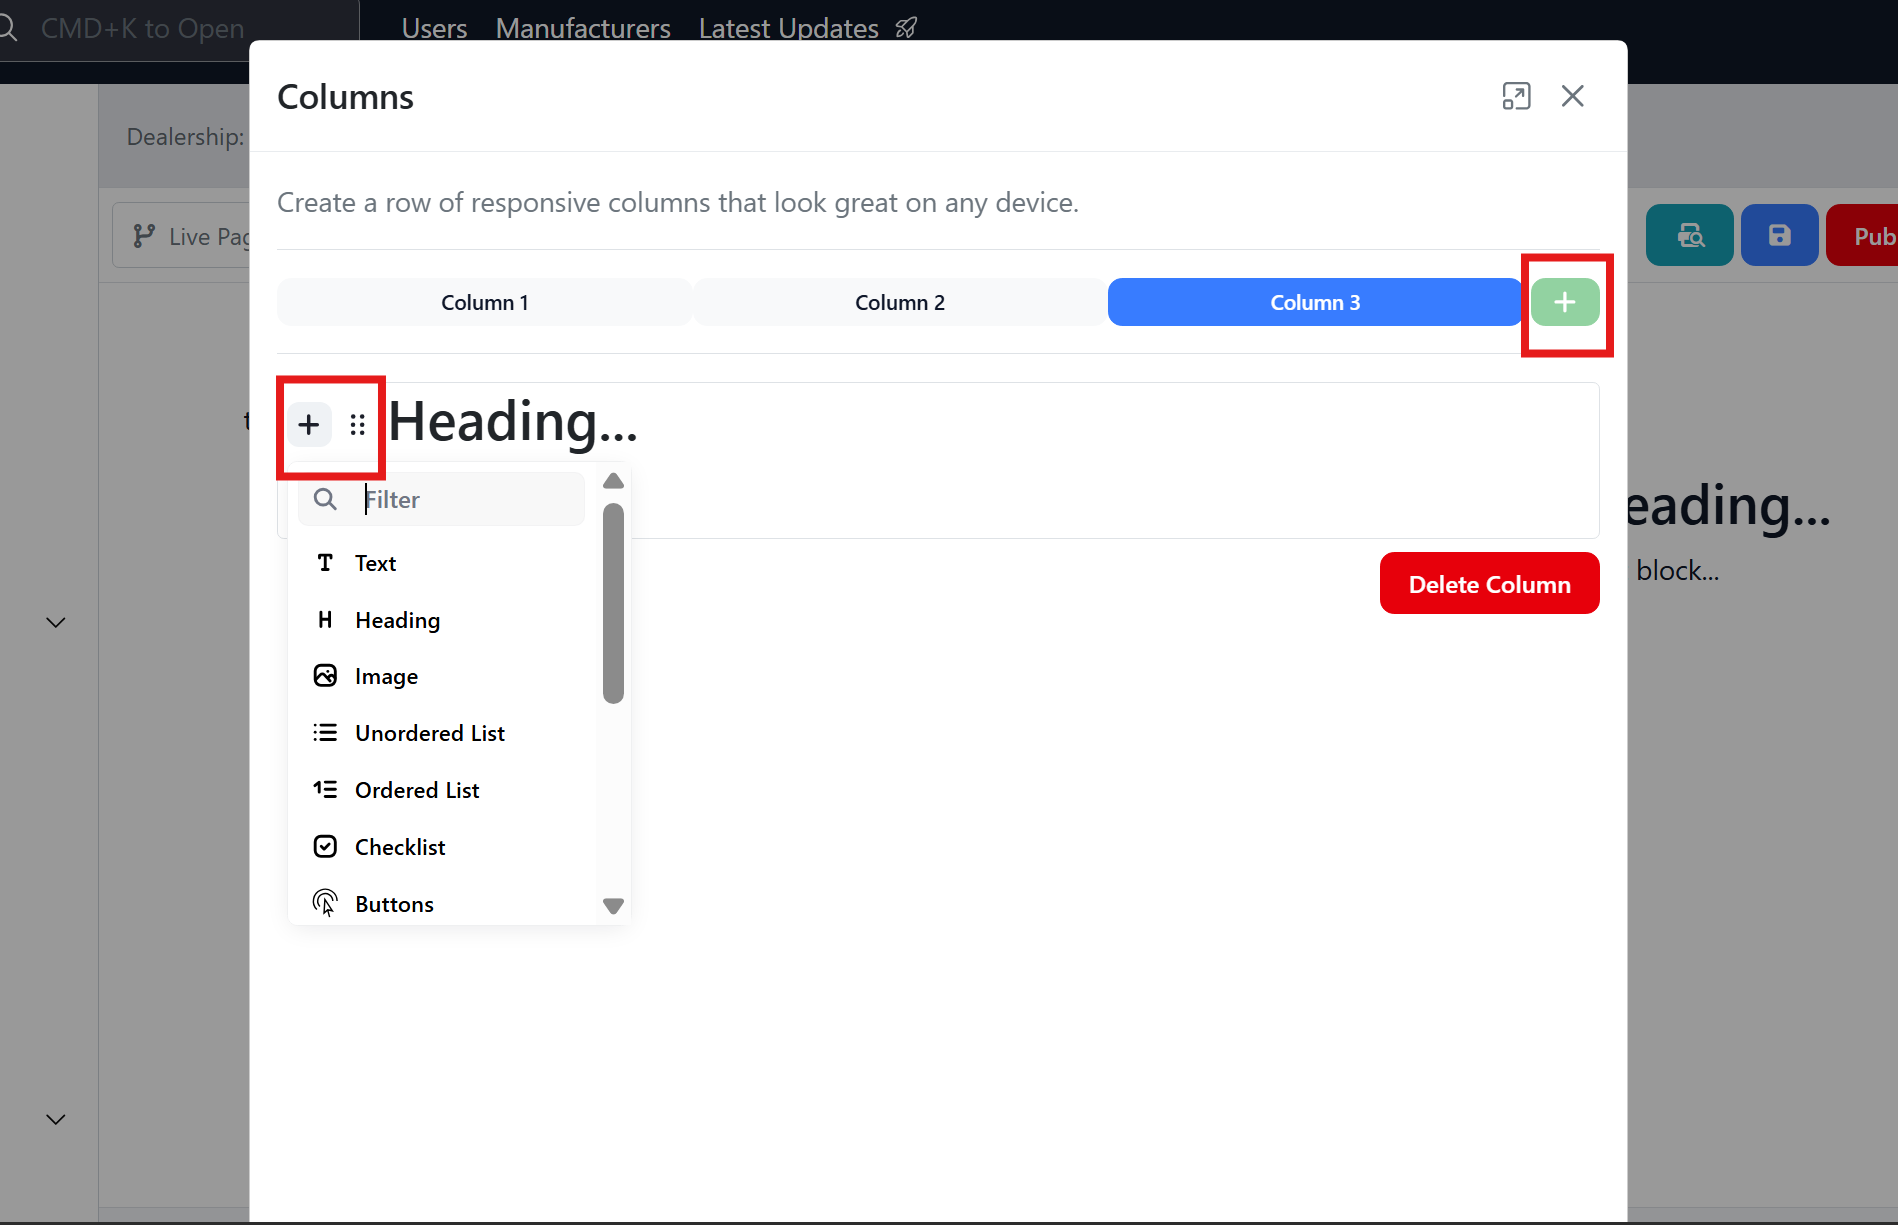
To adjust the font, alignment, colour, margins or other features, select the 6 dots icon next to the text block.
To add further columns (maximum 3), select the green + button to the right of the blue bar.
How to Add Alternating Columns
-
Navigate to the desired area of the page. Hover your mouse over the left-hand side until the '+' icon appears. Click on the icon, then scroll down and select the Alternating Columns button.
-
Text with Heading... and Text block... will appear. Hover your mouse over the left-hand side of the page where this text is until the 6 dots icon appears. Click on the icon, then select the Edit Settings button.
-
A box will open to customise your columns.
-
Reverse: This will reverse the ordering of the alternating columns.
-
Variant: This will change your alternating columns to the variant version. With this version, each row is wrapped in an alternating background (i.e. grey, white, grey, white, and so on).
To add rows, select the green + icon. Alternating columns allow you to add as many rows as needed to create a seamless flow of text and images.
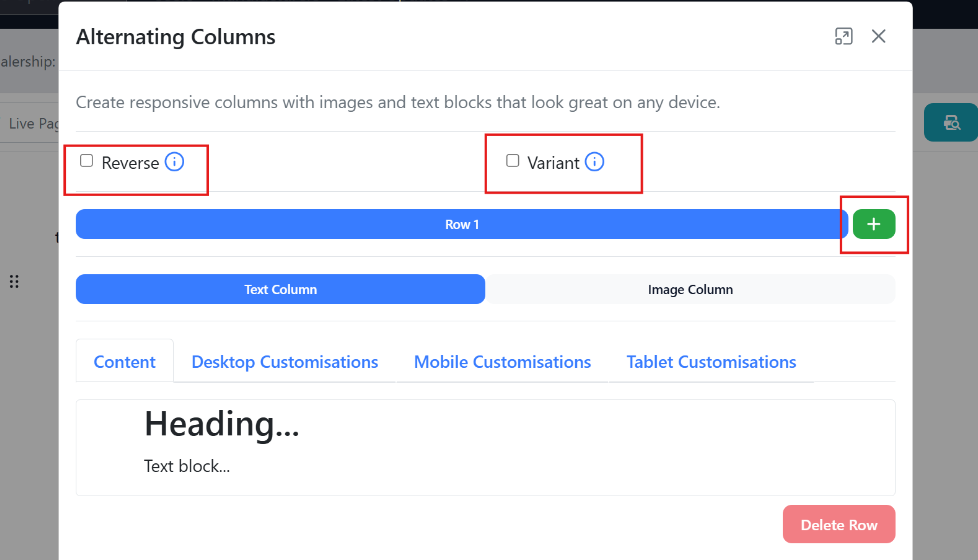
- Below adding rows, you can switch between the text column and the image column. If each row includes both an image and text, ensure you add the content to the appropriate column to maintain the alternating layout between rows.
The text column will display editable text, while the image column won’t—but you can still add text to the image column if desired.
**Text Column: **

Under the content tab, to add text simply highlight the Heading or Text block... and begin typing.
To add features such as images, lists, buttons, tables or FAQs, select the plus icon next to the text block.
 Under Desktop Customisations, you can amend the following:

-
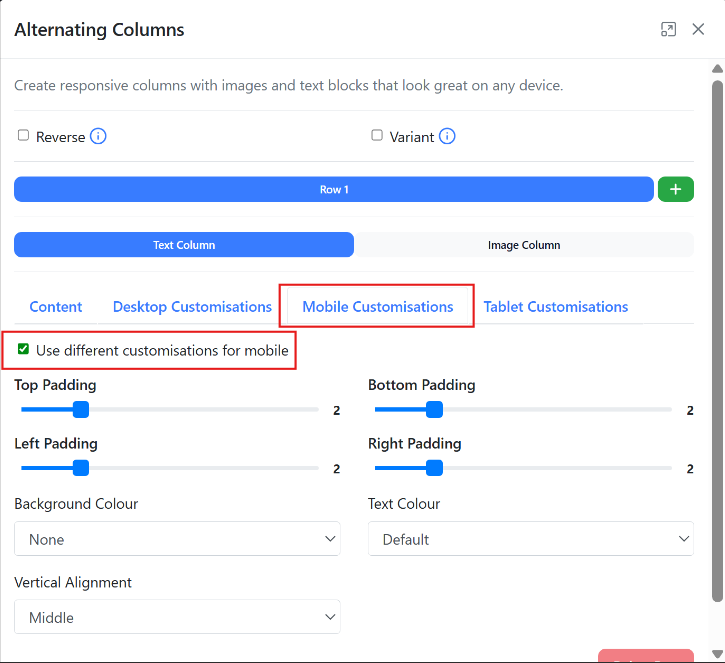
Top Padding: Adjusts space between the top of the content and the container’s edge.
-
Bottom Padding: Controls space between the bottom of the content and the container’s edge.
-
Left Padding: Sets space between the content and the left side of the container.
-
Right Padding: Adjusts space between the content and the right side of the container.
-
Background Colour: Changes the background colour of the content or section.
-
Text Colour: Alters the colour of the text within the section.
-
Vertical Alignment: Positions content vertically within its container (top, centre, or bottom).
Under Mobile Customisations, you can amend the following:
Under Tablet Customisations, you can amend the following:
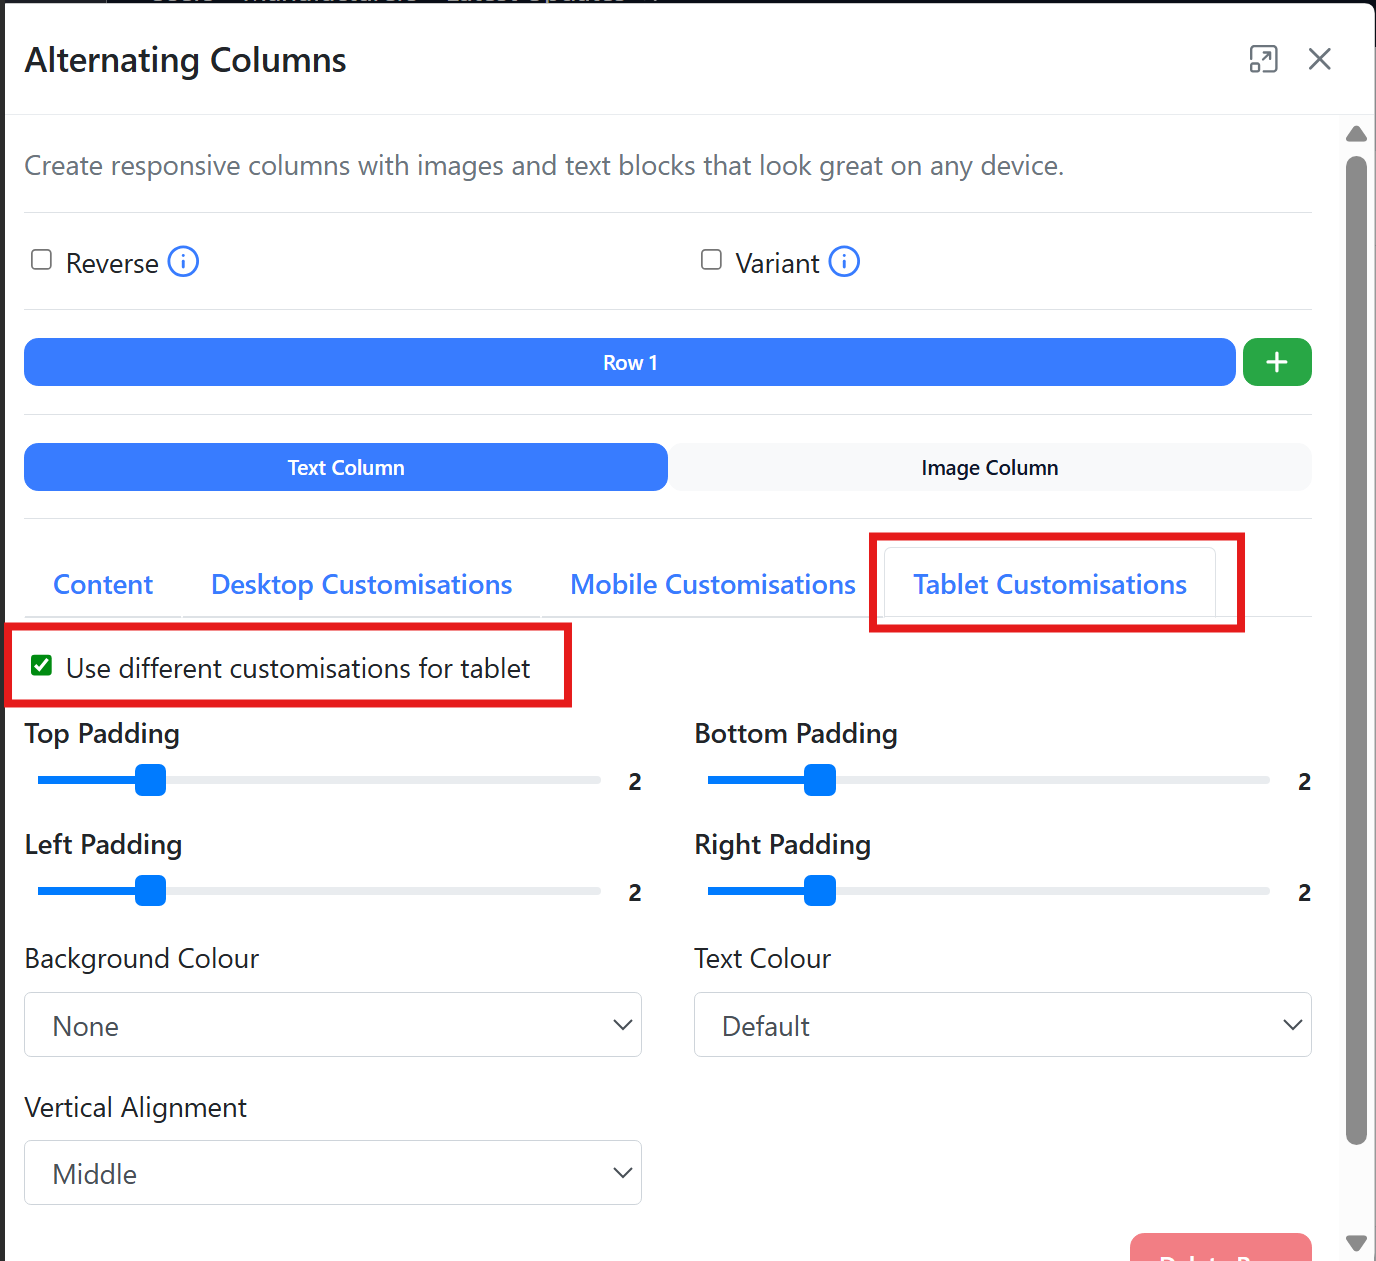
Image Column:
To add content in the image column, find the + button and select either text or image.
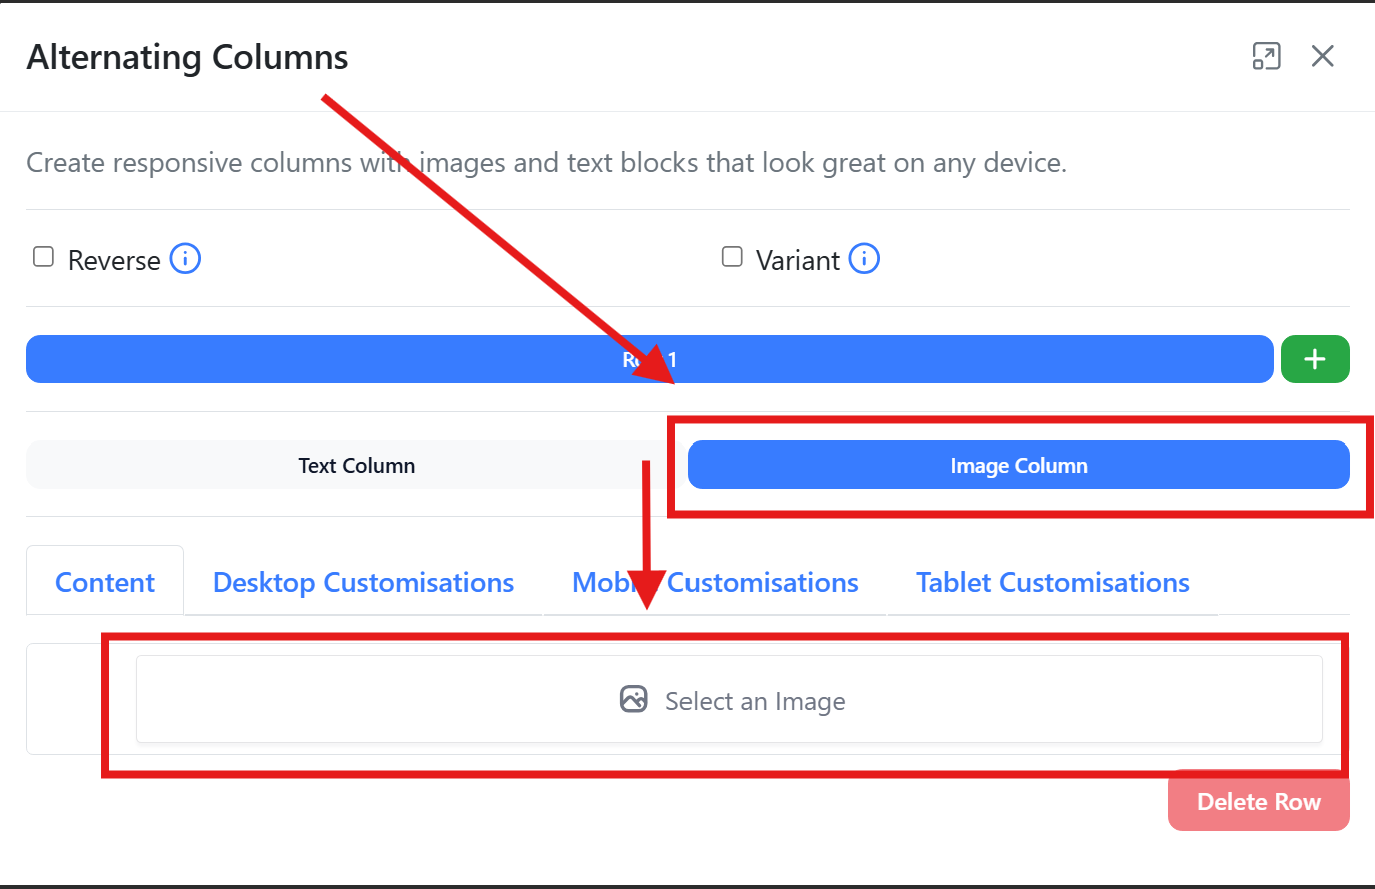
You can amend custom desktop, mobile and tablet customisations in the same way as the text column.
Please see attached video for clarity